NDI is an easy way to send and receive high quality, low latency video and audio between supported devices using a standard Gigabit enabled network.
For example you can produce one aspect of your show on one computer and send the output to vMix running on another.
You can also add any NDI enabled source to vMix as long as it is on the same network. This might be a NDI enabled hardware device
or another computer or laptop running 3rd party software that supports the NDI standard.
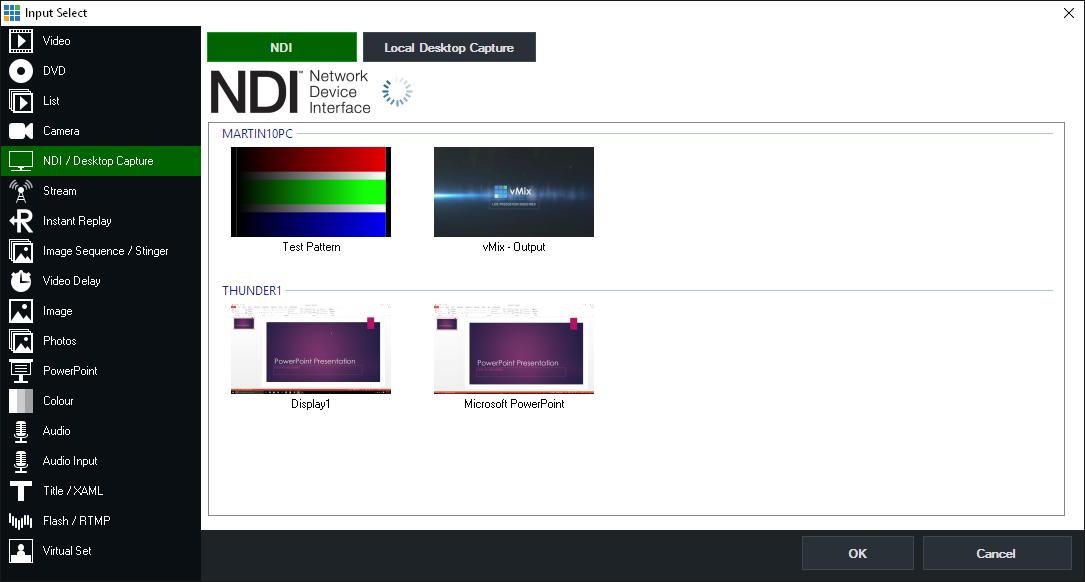
Sources detected on the network will appear automatically in the list with a preview thumbnail and organised by device or computer name as shown below.

In the screenshot above, there are four NDI sources available across two different computers.
You can bring into vMix the desktop of a remote PC or Mac simply by downloading and running the free vMix Desktop Capture application from the vMix web site.
http://www.vmix.com/software/download.aspx
While the vMix Desktop Capture program is running, any windows open on that computer will appear in the NDI list.
In the screenshot above, Microsoft PowerPoint is running on a laptop called "THUNDER1" and can be added to vMix simply by double clicking it from the list.
vMix Desktop Capture Features
NOTE: users running versions of vMix Desktop Capture older than 17 will need to upgrade the software to the latest version
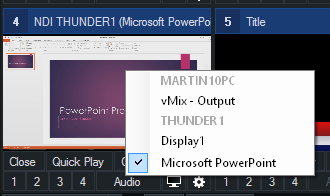
Once the initial NDI source or desktop capture has been added, a right click menu is available to change the source at any time.

Low Bandwidth Mode: This will switch NDI to use a low resolution / low bandwidth version of the source video.
Audio Only: Disable video, only bring in audio from NDI source.
PsF: If NDI source is a camera that sends progressive over interlaced video, tick this box to improve video quality.
Increase Buffer Size: On unstable/wireless networks, ticking this option can improve the smoothness of the video. Will increase latency by approximately 5 frames.